Posted on 1 Comment

Silky Smooth Lemon Curd- ( Totally Fool-Proof Method)

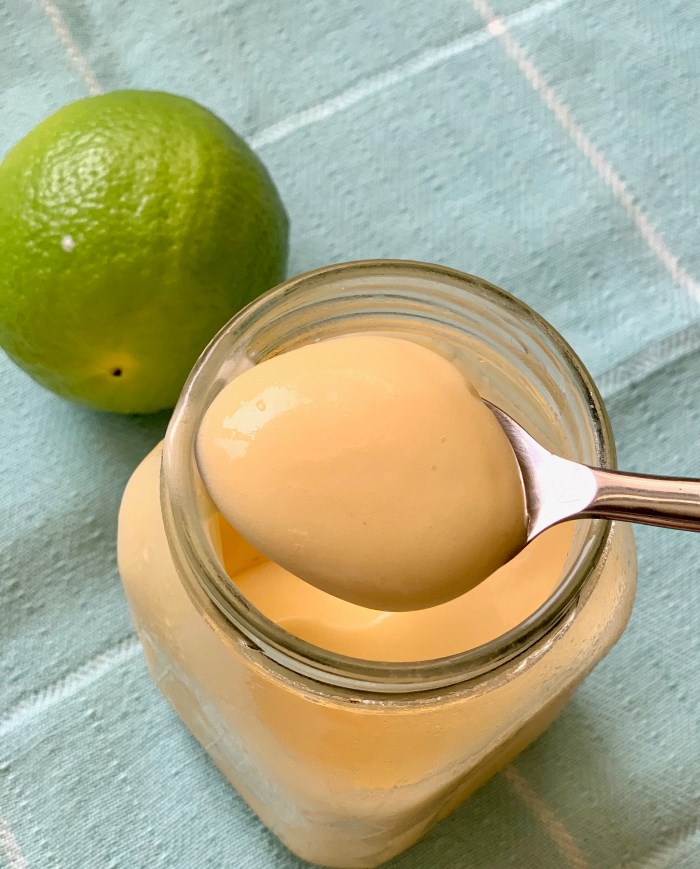
Lemon Curd is a rich, soft, buttery and custard like spread or topping that has a deliciously tart yet sweet citrus flavour.

This method of making Lemon Curd is totally fool-proof. It will ensure a perfect velvety smooth lemon curd with no lumps. I discovered this perfect trick to make Lemon Curd after few hits and trials.  It is so easy that I started calling it Fool Proof Lemon Curd Recipe. 

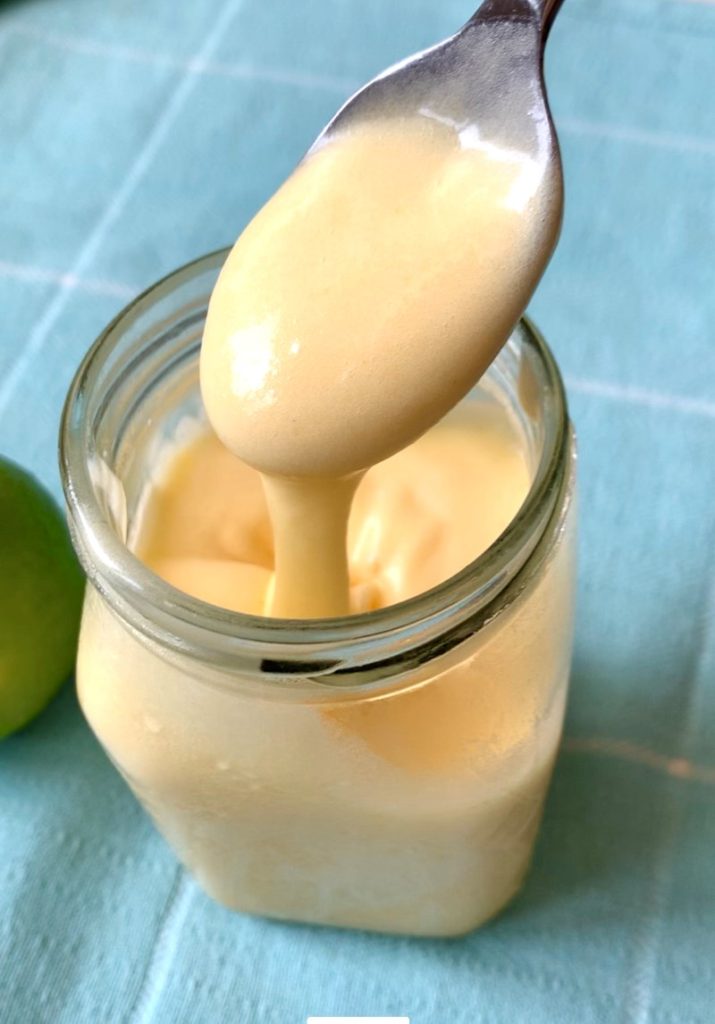
I can bet that you will stop buying it from the market once you use this recipe. Your store bought doesn’t even come close to this. One spoonful of this and you will literally go “mmmmmm”. It’s that good.

The trick to make perfectly smooth lemon curd is whole egg. Most cooks don’t use egg white in Lemon Curd because chances of egg white coagulating is higher but egg white gives a very light, almost custardy texture which I love. The trick to get it right is simple. You just have to whip it well, keep stirring and cook on low flameDO NOT LET IT BOIL!

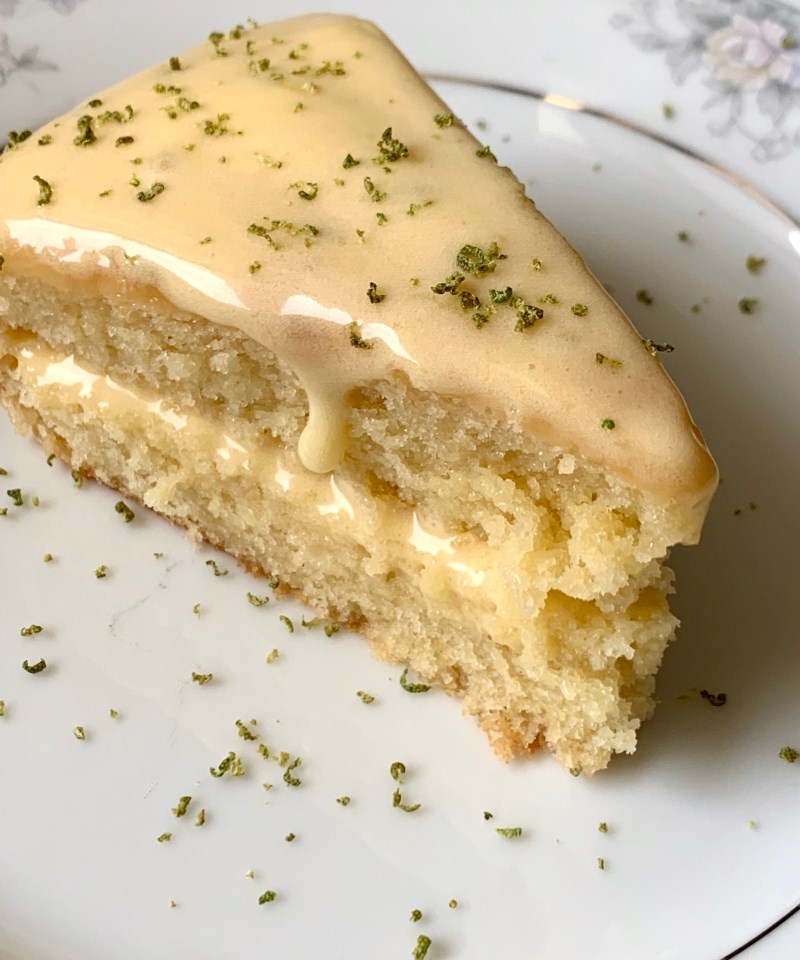
How to use Lemon Curd?

Well, there are countless ways to use it. While traditionally it was used as a spread for scones. But it makes a delicious filling or topping for tarts, pies, cakes, pancakes, crepes, cheesecakes and the list goes on and on. 

How long does it last?

If stored in a refrigerator in an airtight glass jar, this can last you almost a month. And yes, this freezes well too. Just thaw before using it and it is good to go. 

Points to Remember

  • I like to use Meyer lemon for making this but you can use whatever is easily available.
  • It is always good to weigh the ingredients and not use a rough estimate in recipes like these. 
  • Always use a double boiler for this recipe. If you don’t have a double boiler, make a makeshift double boiler by placing a heatproof glass bowl on top of a larger pot. Just make sure the bottom of the bowl does not touch the water in the larger pot. 

Recipe

Prep time: 5 minsServing: makes 400 ml
Cook time: 15 mins

Ingredients

  • Egg yolks: 2 large
  • Whole egg: 1
  • Castor sugar: 80 gms
  • Cornflour: 1 tbsp
  • Lemon juice: 90 ml
  • Cold Butter: 75 gms (cut in cubes)
  • Salt: 1/4th tsp
  • Lemon zest: 1 tsp

Method

  1. Before starting, keep all the ingredients ready. Keep butter cubes in refrigerator.
  2. Make a double boiler setting. Take a pan and a heat proof bowl. Use either a glass bowl or a stainless steel bowl. No aluminium. Add some water in the pan. The bowl should not be touching the water. 
  3. In the heat proof bowl, add egg yolks, whole egg, cornstarch & sugar. Whip till it becomes light and fluffy and sugar almost melts. This should take 2-3 minutes.
  4. Heat lemons in microwave for 10-15 seconds and squeeze out 90 ml juice. Add lemon zest to the heat proof bowl and then gradually add lemon juice in 2-3 batches, whisking each time. 
  5. While you are whisking, heat the water. Do not let the water boil. Now put the heat proof bowl on top. 
  6. Cook on the lowest flame. Keep stirring continuously till it thickens. This is very important otherwise chances are the eggs will coagulate. It’ll take roughly 15 minutes. 
    In case the water beneath starts boiling, take it off heat for a few seconds then put it back. The idea is to allow it to cook & thicken on low heat.
  7. Take a wooden spoon/spatula and check after 12 minutes. It should coat the back of the spoon. Slide your finger, if the path is clear then it’s cooked. If not or you are unsure, cook it for a few more minutes. 
  8. Once off heat, add cold butter cubes one by one and keep whisking continuously till it incorporates fully. Then sieve it for a smooth lemon curd. Transfer it to an airtight glass jar and refrigerate. It’ll thicken further on cooling.
  9. It tastes much better after 1-2 days. If you plan to make a dessert using lemon curd, make it a couple of days in advance. 
Posted on Leave a comment

5 ways to use Desi Ghee besides Eating it!

Desi ghee, revered in Indian culture not just as a culinary delight but also as a symbol of purity and wellness, offers a cornucopia of uses that transcend the boundaries of the kitchen. Let’s embark on an in-depth exploration of this golden elixir, understanding its myriad applications that make it an indispensable asset in every household.

The Culinary Cornerstone

In the realm of cooking, desi ghee is unparalleled. Its high smoke point makes it an ideal medium for sautéing, frying, and baking, lending a rich, nutty flavor to dishes. From the crispy layers of a flaky paratha to the sumptuous richness of a biryani, ghee’s presence is unmistakable. In sweets, it transforms ordinary ingredients into delightful treats like laddus and halwas, etching unforgettable flavors in our memories.

Beyond Baking: A Gluten-Free Ally

In gluten-free baking, ghee stands as a worthy substitute for butter or coconut oil. Its unique composition imparts moisture and richness to gluten-free bread, muffins, and cakes, ensuring that dietary restrictions don’t compromise on taste and texture. Whether it’s in a pie crust or a batch of homemade cookies, ghee’s versatility shines through, making it a favorite among gluten-free connoisseurs.

A Tonic for Tresses

Venturing into the realm of hair care, desi ghee is a hidden gem. A blend of ghee with nourishing ingredients like amla and almond oil can be a transformative hair mask, offering deep conditioning, enhancing hair growth, and imparting a natural sheen to your locks. Regular use of this ghee-based concoction can revitalize dull, lifeless hair, making it a prized component of traditional hair care routines.

Infant Care: More Than Just Nourishment

Ghee’s gentle, nourishing properties make it an excellent choice for infant massage. It aids in weight gain, ensures soft skin, and improves circulation in babies. This practice, steeped in tradition, is not just about physical well-being but also about forging a bond of love and care between parent and child.

A Balm for the Skin

For skin care, desi ghee is a potent remedy. Its healing properties make it effective against burns, wounds, and skin irritations. Its use in traditional medicine as a topical application for minor injuries underscores its antibacterial and anti-inflammatory qualities.

Ayurvedic Wisdom: Ghee as a Holistic Healer

In Ayurveda, ghee is more than a dietary ingredient; it’s a rasayana – a rejuvenating and longevity-promoting substance. From improving digestion and detoxifying the liver to boosting immunity and enhancing eye health, ghee’s therapeutic benefits are vast. Rich in essential fatty acids, it is believed to balance both vata and pitta doshas, making it a cornerstone in Ayurvedic treatments.

Purifying Air with Tradition: Ghee Diyas

In traditional practices, lighting ghee diyas is believed to purify the air, providing a serene and healthy environment. This practice, especially prevalent during festive and rainy seasons, not only adds a spiritual dimension but also underscores ghee’s antiviral and antibacterial properties.

Digestive Health: A Gut-Friendly Fat

In the domain of digestive health, desi ghee plays a pivotal role. Its unique short-chain fatty acids are known to enhance gut health and aid in digestion. When combined with a diverse array of Indian spices, ghee not only elevates the taste of a dish but also ensures that the nutrients are more effectively absorbed by the body.


Embracing the Golden Goodness of Desi Ghee

Desi ghee is a testament to the wisdom of traditional practices, blending culinary enjoyment with health and wellness. Its multifaceted applications, from being a heart-friendly ingredient to a natural conditioner for hair and skin, make it a valuable addition to daily life. Whether used in cooking, as part of a beauty regimen, or as a natural remedy, desi ghee’s benefits are manifold.

As we continue to discover the wonders of this golden elixir, it’s essential to remember the importance of purity and quality in ghee. Pure, high-quality desi ghee, used in moderation, can be a powerhouse of nutrition and wellness. Embrace the myriad benefits of desi ghee and let it enrich your lifestyle in countless ways, from your plate to your skin and beyond.

10 FAQs about Desi Ghee

  1. What exactly is desi ghee? Desi ghee, or clarified butter, is made by simmering butter to separate the milk solids and water from the fat, resulting in a pure, aromatic fat.
  2. Can desi ghee be used in vegan diets? No, since desi ghee is made from cow’s milk, it is not suitable for a strict vegan diet. However, those with lactose intolerance may tolerate it better due to the removal of milk solids.
  3. Is desi ghee healthier than regular butter? Desi ghee is often considered healthier due to its higher smoke point, which makes it more stable for cooking, and its richness in fat-soluble vitamins.
  4. Can I use desi ghee for baking? Absolutely! Desi ghee can be a great substitute for butter in baking, offering a rich, nutty flavor to cakes, cookies, and bread.
  5. How does desi ghee benefit hair and skin? Rich in fatty acids, desi ghee is excellent for nourishing and moisturizing the skin and hair. It can be used as a natural conditioner and a skin moisturizer.
  6. Is desi ghee good for digestion? Yes, desi ghee contains butyric acid, which is beneficial for the digestive system. It aids in the absorption of nutrients and improves gut health.
  7. How should I store desi ghee? Store desi ghee in an airtight container at room temperature. It has a long shelf life and does not require refrigeration.
  8. Can desi ghee help in weight loss? In moderation, desi ghee can be a part of a healthy diet. Its fatty acids can help in satiating hunger and boosting metabolism.
  9. Is desi ghee suitable for high-heat cooking? Yes, desi ghee has a high smoke point, making it ideal for sautéing, frying, and other high-heat cooking methods.
  10. How can I use desi ghee in my daily routine? Desi ghee can be used in cooking, as a spread on bread, in baking, for skin and hair care, and even for lighting lamps in traditional practices.

Blog Tags for the Post

desi ghee, health benefits, cooking, baking, hair care, skin care, Ayurveda, nutrition, wellness, traditional remedies, gluten-free baking, digestive health, natural beauty, Indian cuisine, clarified butter

Posted on Leave a comment

Is a KitchenAid Mixer Worth It? Let’s Find Out!

yellow kitchenaid stand mixer

Hello, baking enthusiasts! 🥧🍪🍰

Today, we’re diving into a topic that’s been on the minds of many home bakers and professionals alike – is investing in a KitchenAid mixer really worth it? To help answer this question, we’re turning to Natalia Lima, the founder and owner of Curious Cat Bakery, an all-vegan bakery based out of Florida. Natalia has shared her insights in a detailed video on her YouTube channel, which you can watch here.

The Investment 💰

KitchenAid mixers are a significant investment, with prices ranging from around $300 for refurbished models to up to $800-$900 for the commercial series. However, for this discussion, we’ll focus on the more affordable end of the spectrum, which is likely where most amateur bakers are looking.

The Uses of a KitchenAid Mixer

A KitchenAid mixer is a versatile tool that can handle a variety of baking tasks. From kneading bread dough to whipping up a batch of cookies, this appliance can do it all. It’s especially useful for tasks that require a lot of arm work, like kneading bread dough. With a KitchenAid mixer, you can simply turn it on and let it do its thing, freeing up your time and energy for other tasks.

The Comparison: Artisan vs. Professional Series 🥊

Natalia compares two models of KitchenAid mixers that she has used and loved for years – the Artisan series and the Professional series.

The Artisan series, which Natalia started with, is a great beginner model. It has a tilt-head design that allows you to easily add ingredients. This model is perfect for lighter tasks and smaller batches.

On the other hand, the Professional series is more robust and can handle denser doughs and larger batches. It has a bowl-lift design, which means the bowl moves up and down instead of the head tilting back and forth. This model is ideal for those who bake frequently or in large quantities.

The Verdict 🏆

So, is a KitchenAid mixer worth it? According to Natalia, it depends on how much you use it. If you’re an avid baker who bakes every other day or so, then yes, it’s definitely worth the investment. However, if you only bake occasionally, then it might not be the best choice for you.

Remember, a KitchenAid mixer is a machine, and like any machine, it can get tired. If you’re doing several batches one after the other, you’ll need to give it a break to cool down.

In conclusion, a KitchenAid mixer can be a game-changer for those who bake frequently. It can make the baking process more enjoyable and efficient, and the final product more reliably predictable. But, as with any investment, it’s important to consider your individual needs and circumstances before making a decision.

For more insights from Natalia and to get a sneak peek behind the scenes of running a bakery, make sure to subscribe to her YouTube channel and join our Facebook community where we share our love for all things baking!

Posted on Leave a comment

Cheese and Chive Scones Recipe

woman in apron preparing food against light background

Welcome back, baking enthusiasts! Today, we’re exploring a bit off the beaten path, leaving behind the realm of sweet and venturing into the savory with an enticing twist on a classic English recipe: Cheese and Chive Scones. These scones are the perfect addition to a hearty breakfast, an ideal snack for a quick pick-me-up, or a tasty accompaniment to your favorite soup or salad. They’re also the perfect solution for those with a less sweet tooth but who still crave a satisfying treat with their afternoon tea.

What Makes Cheese and Chive Scones Special?

Unlike traditional scones, which are often sweet and served with clotted cream and jam, these savory scones are studded with sharp cheddar cheese and fresh chives. This combination offers an irresistible balance, with the rich, tangy cheese complementing the mild, onion-like taste of chives.

Cheese and Chive Scones are not just delectable, but also surprisingly easy to make, requiring only a handful of ingredients and a little time. They’re fantastic served warm, straight from the oven, but they cool well for later enjoyment too.

One of the best things about this recipe is its versatility. If you’re feeling adventurous or want a different flavor profile, the recipe is flexible. Add some cooked, crumbled bacon for Bacon Cheddar Chive Scones or swap the chives for chopped scallions for Cheddar Scallion Scones. The possibilities are endless!

Let’s Get Baking!

Without further ado, let’s get started on our Cheese and Chive Scones!

Ingredients

  • 3 cups (375g) self-rising flour
  • 1 cup (225g) cold butter, cut into small cubes
  • 1 cup (115g) cheddar cheese, grated
  • 3 tablespoons fresh chives, chopped
  • 1 cup (240ml) milk
  • 1 egg, for egg wash

Instructions

  1. Preparation: Preheat your oven to 220C/200C Fan/Gas 7 (425F) and line a baking sheet with parchment paper.
  2. Mix the Dough: In a large mixing bowl, combine the self-rising flour and cold butter. Use your fingers to rub the butter into the flour until the mixture resembles fine breadcrumbs.
  3. Add the Flavor: Stir in the grated cheddar cheese and chopped fresh chives.
  4. Form the Dough: Gradually add the milk, stirring with a fork until a dough starts to form. You might not need all the milk, so add it slowly to avoid making the dough too wet.
  5. Knead and Cut: Turn the dough out onto a lightly floured surface and knead it gently just a few times to bring it together. Roll out the dough to about 2cm thick and use a round cutter to cut out the scones. Arrange the scones on your prepared baking sheet.
  6. Final Touches: Beat the egg and use it to brush the tops of the scones. This will give them a beautiful, golden color as they bake.
  7. Bake: Bake the scones in your preheated oven for about 12-15 minutes, or until they’re golden brown and well risen.
  8. Cool and Serve: Allow the scones to cool on a wire rack for a few minutes before serving.

And there you have it, homemade Cheese and Chive Scones! A delicious alternative to sweet scone recipes. Whether you serve them for breakfast or enjoy them as a snack, they’re sure to be a hit!

Share your baking adventures with us using the hashtags #CheeseChiveScones, #Baking, #EnglishScones, and #HomemadeScones. We can’t wait to see your creations!

Stay tuned for more delectable recipes, and happy baking!

Blog Tags: Cheese and Chive Scones, Baking, English Scones, Homemade Scones, Savory Scones, Cheddar Cheese, Chives, Quick and Easy Recipes, Breakfast Ideas, Snack Recipes, Versatile Baking, Cheddar and Chive Scones, Cheddar Scallion Scones, Bacon Cheddar Chive Scones

Posted on Leave a comment

Easy English Scone Recipe

food man people woman

The humble scone: a basic yet versatile bakery delight that’s been a cherished part of British culinary tradition since its Scottish birth. Now a centerpiece in the beloved English afternoon tea, this simple pastry has won hearts globally with its tender, crumbly texture and perfect balance of flavors.

What Makes English Scones Special?

Distinct from the sweet, varied-flavor scones of America, the traditional English scone is typically plain or dotted with currants. The scone’s charm lies in its modesty – a circular, slightly sweet delight baked to golden perfection. Its tender, crumbly texture makes it an ideal companion for clotted cream and strawberry jam, in a combo popularly known as a “cream tea”. English scones serve as a neutral, yet satisfying canvas allowing the harmonious marriage of cream and jam to take center stage.

The Tradition of English Scones

The custom of baking and relishing scones is entwined with the English tradition of afternoon tea, dating back to the 1840s. The habit, initiated by Anna, the Duchess of Bedford, intended to bridge the hunger gap between lunch and a late dinner. Now, it’s an integral part of British culture, replete with finger sandwiches, a variety of cakes, pastries, and, of course, scones served with clotted cream and jam.

Let’s dive into the recipe of a traditional English scone and explore its delectable variations, accommodating varied dietary needs and preferences.

1. Traditional English Scone Recipe

Whip up a classic English scone with these simple ingredients and steps:

Ingredients:

  • 3 cups all-purpose flour
  • 1/2 cup sugar
  • 5 teaspoons baking powder
  • 1/2 teaspoon salt
  • 3/4 cup (1 1/2 sticks) unsalted butter, chilled and cut into small cubes
  • 1 cup whole milk
  • 1 egg
  • 1 teaspoon pure vanilla extract

For the egg wash:

  • 1 egg beaten with a splash of milk

Instructions:

  1. Preheat your oven to 200°C (approximately 392°F) and line a baking tray with parchment paper.
  2. In a large bowl, combine the flour, sugar, baking powder, and salt.
  3. Add the cold, cubed butter to the flour mixture. Use your fingers, a pastry cutter or a food processor to work the butter into the flour until the mixture resembles coarse crumbs.
  4. In a separate bowl, whisk together the milk, egg, and vanilla extract. Gradually add this to the flour mixture, stirring until just combined. Remember, overmixing can lead to tough scones.
  5. Turn the dough out onto a lightly floured surface and knead it gently a few times to bring it together.
  6. Pat the dough into a rectangle about 1 inch thick. Using a round biscuit cutter (or a glass), cut out scones from the dough and place them on the prepared baking tray. You can re-roll the scraps to cut out more scones.
  7. Brush the tops of the scones with the egg wash.
  8. Bake in the preheated oven for 15-20 minutes or until the scones are golden brown.
  9. Allow the scones to cool on the tray for a few minutes, then transfer them to a wire rack to cool further.
  10. Serve warm with clotted cream and strawberry jam, or simply butter.

Enjoy your homemade traditional English scones with this Easy Recipe!

Variations

2. Vegan Scones – In a compassionate twist on the classic, replace butter with coconut oil and use plant-based milk. You can even replace the traditional egg wash with a simple brush of almond milk for a golden finish.

3. Gluten-Free Scones – Perfect for those with dietary restrictions. Replace regular flour with a mix of almond and coconut flour. A hint of xanthan gum will keep your gluten-free scones springy and delicious.

4. Cheese and Chive Scones – Transform the humble scone into a savory delight. Add grated sharp cheddar and finely chopped chives to your basic scone mixture. Serve warm with butter for a satisfying snack or as a side to a hearty soup.

5. Blueberry Scones – Introduce a fruity twist to the classic scone. Fold in fresh blueberries to your scone dough for a burst of sweet and tart flavors with every bite.

6. Lemonade Scones – Intriguing and surprisingly delightful, lemonade scones are exceptionally light and fluffy. The lemonade offers a subtle sweetness and hint of citrus to these novel scones.

Frequently Asked Questions

  1. What are English Scones?
    • English scones are a type of baked goods that originated in the United Kingdom. They are often lightly sweetened and typically served with clotted cream and jam.
  2. How are English Scones different from other types of scones?
    • English scones are generally less sweet and more dense than American scones. They are usually plain or have currants or raisins added in, while American scones often come in a variety of flavors and can be packed with mix-ins like berries or chocolate chips.
  3. When are English Scones traditionally made and served?
    • English scones are traditionally made and served for afternoon tea, a British custom that usually takes place around 4pm. However, they can also be enjoyed for breakfast or brunch.
  4. Can I make English Scones vegan?
    • Yes, it’s possible to make vegan English Scones by replacing the dairy milk with a plant-based milk and using a vegan butter substitute or coconut oil instead of traditional butter.
  5. Can I add fruits to my English Scones?
    • Absolutely! You can customize your English Scones with a variety of fruits such as blueberries, strawberries, or apples. You can also add dried fruits like raisins or currants.
  6. What is the best way to serve English Scones?
    • English Scones are best served warm with clotted cream and strawberry jam. You can also serve them with butter or whipped cream.
  7. Can I make these scones gluten-free?
    • Yes, you can make gluten-free scones by using a gluten-free flour blend. Just make sure to blend is meant for baking and that it contains xanthan gum, which helps with texture and rise.
  8. How long do homemade English Scones last?
    • Homemade English Scones can last for up to two days when stored in an airtight container at room temperature. For longer storage, you can freeze them for up to three months.
  9. Can I reheat my English Scones?
    • Yes, to reheat English Scones, warm them in a preheated 350°F oven for about 10 minutes.
  10. I’m following a keto diet. Can I still make English Scones?
    • Yes, to make keto-friendly English Scones, you can substitute regular flour with almond flour or coconut flour and replace the sugar with a low-carb sweetener.

From vegan to gluten-free, fruity to savory, scones offer endless possibilities. Their versatility ensures there’s a variant to satisfy every palate and dietary preference. Whether it’s a soft, fluffy scone to accompany your afternoon tea, a healthy oatmeal scone for a quick breakfast, or a savory cheese scone to serve with a winter soup, mastering the art of scone-making offers a world of culinary delights.

Embrace the tradition, master the basic recipe, and let your imagination guide your scone variations. Happy baking!